Raspberry Pi Installation
Second supports a Raspberry Pi 5 running Pi OS Bookworm or newer. It may be possible to use it on a Pi 4 or older, but this is untested.
An automated installation script is provided to simplify the setup process of a kiosk system.
Kiosk Installation
Requirements
- Raspberry Pi 5
- microSD card (8GB or larger)
- Another computer to flash the microSD card
- Internet connection
- Keyboard and mouse (for initial setup)
- Display (touchscreen recommended for kiosk use)
Flashing SD card with Pi OS Lite
Raspberry Pi Imager is required to flash the microSD card. This guide is written for Pi Imager 2.0.0 or newer.
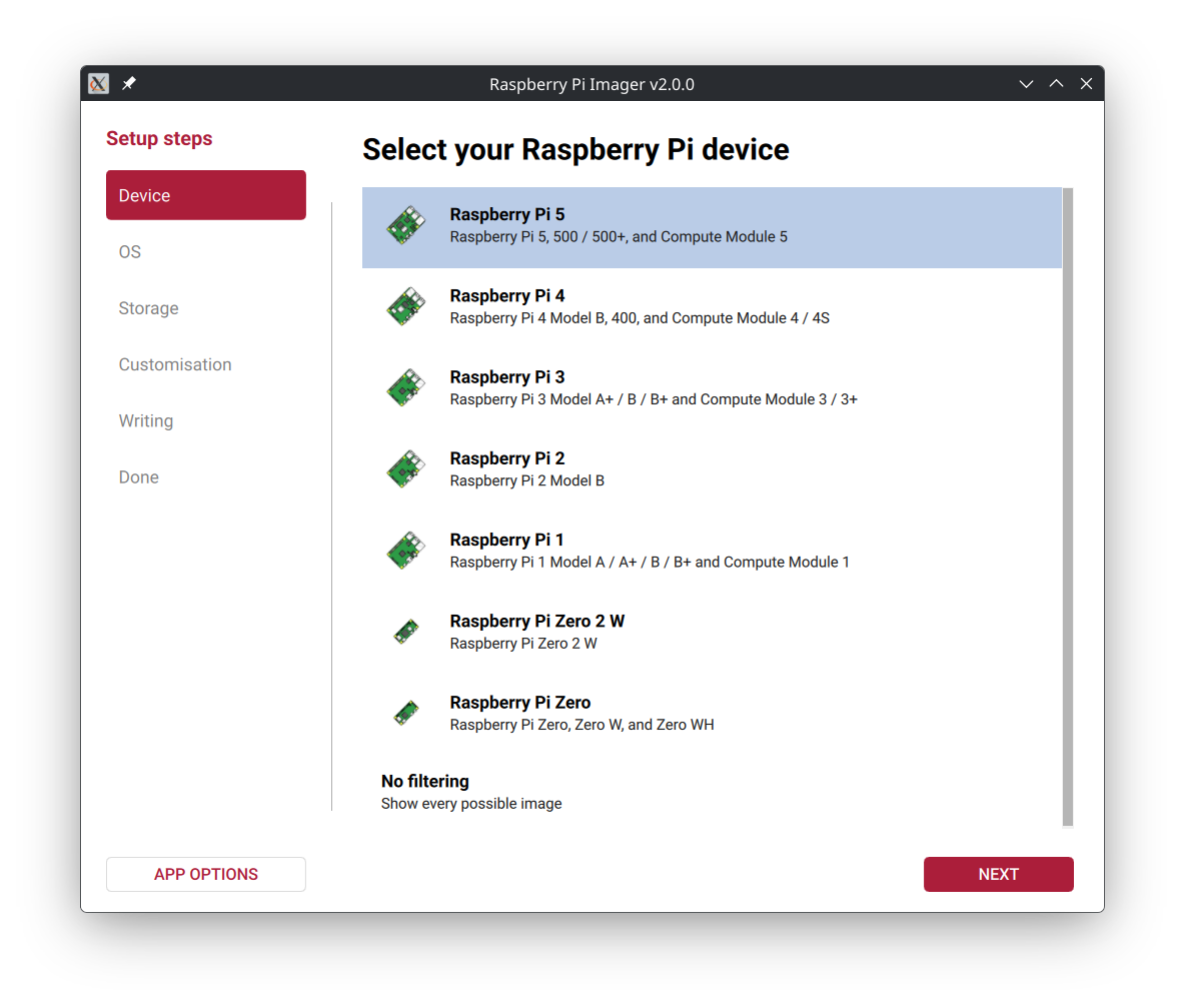
Select the target board
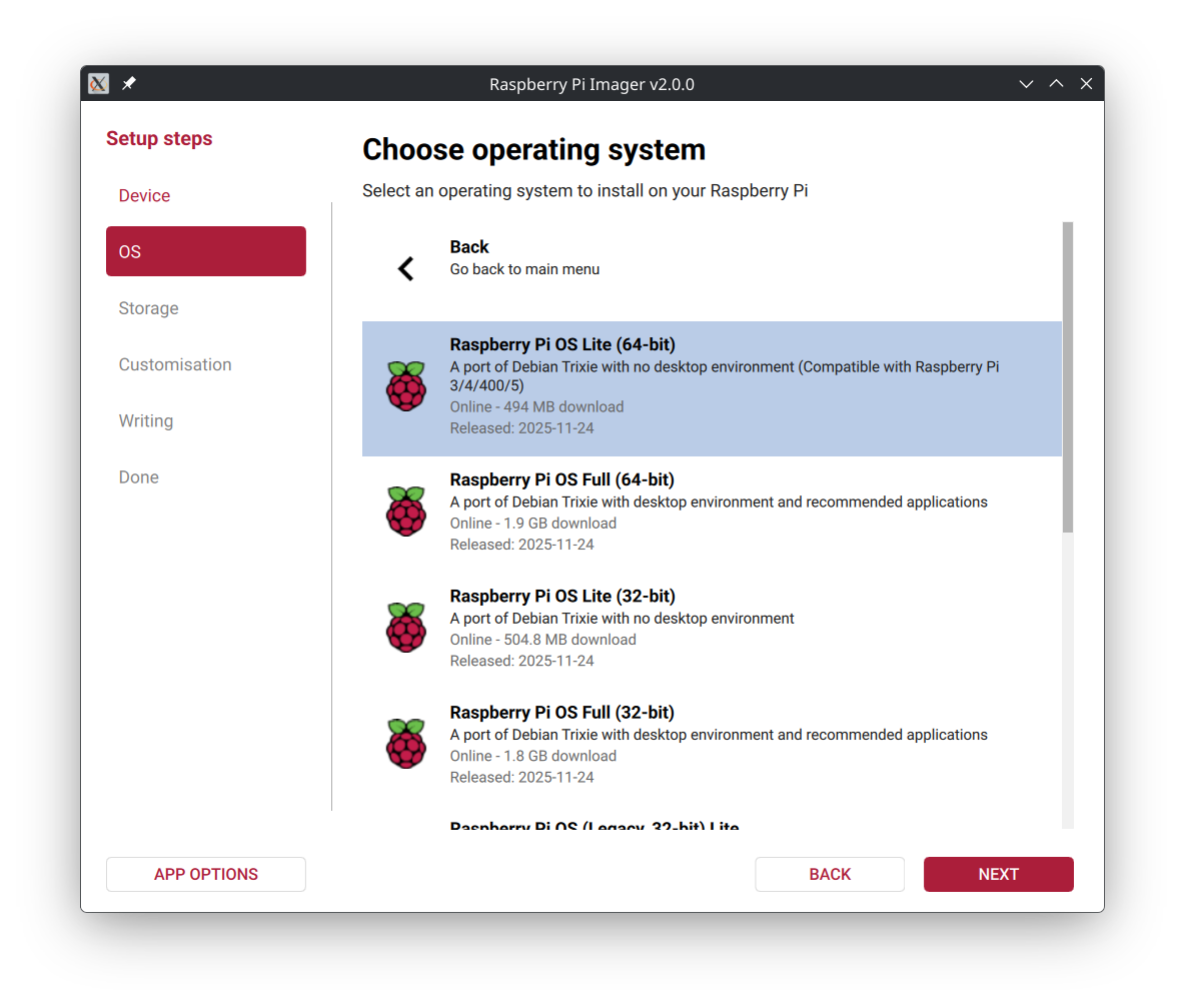
Select Pi OS Lite (64-bit)
Raspberry Pi OS (other) → Raspberry Pi OS Lite (64-bit)
Select the microSD card
Insert the microSD card into your computer and select it in Pi Imager.
This will erase all data on the selected drive.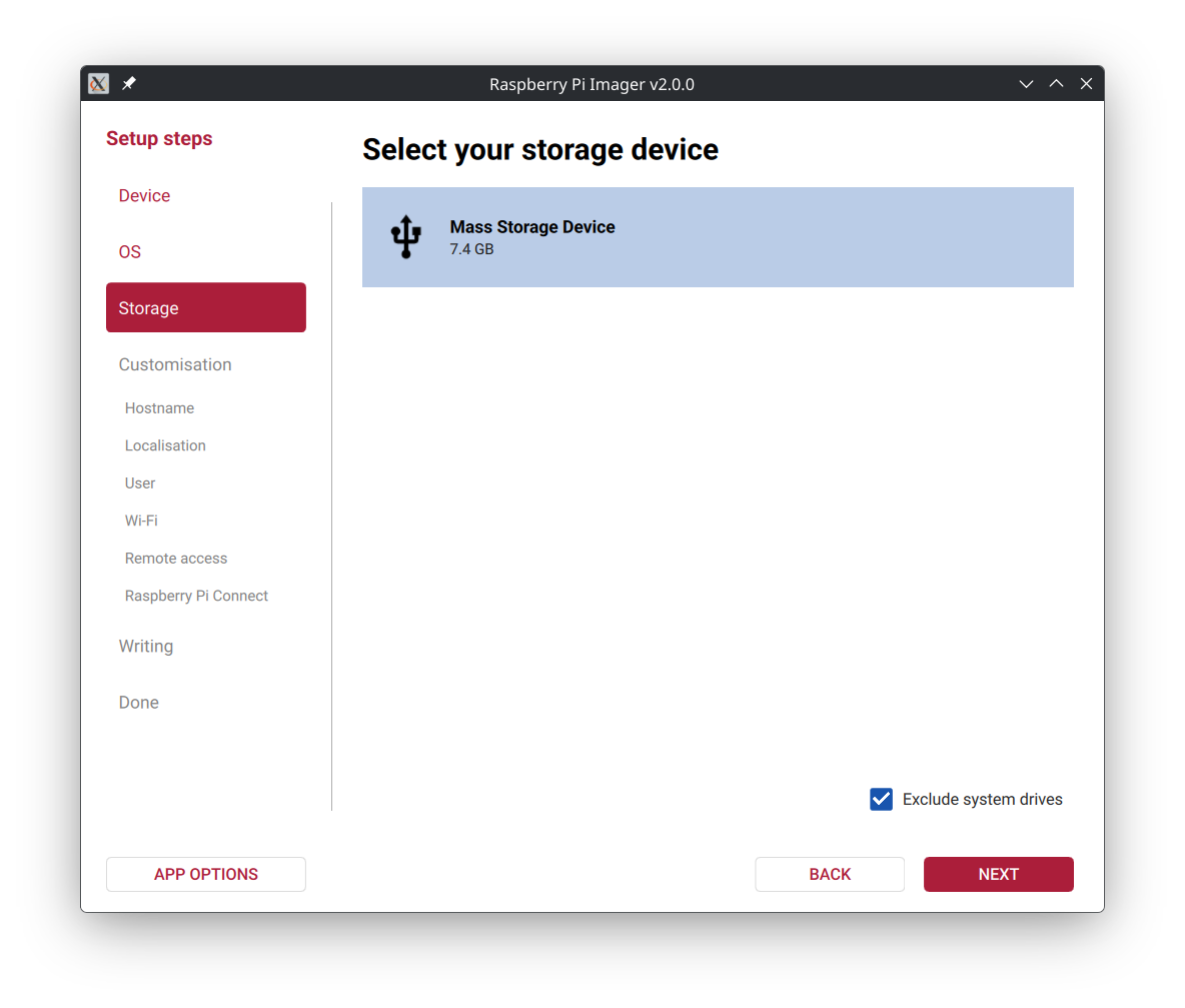
Customization
Here you will enable SSH and set up Wi-Fi (if not using Ethernet or your kiosk).
Hostname
Configure a unique hostname for your Raspberry Pi.
Localization
Set your locale, timezone, and keyboard layout.
User
Set a username and password for the kiosk’s user (the kiosk will auto-login).
Wi-Fi
Configure your Wi-Fi SSID and password. Leave the fields blank if using Ethernet.
Remote access
Enable SSH to allow remote access to the Raspberry Pi for running the installation script.
Raspberry Pi Connect
Skip this step. Raspberry Pi Connect will not work with the kiosk setup.
Write the image
Before writing, double-check all settings.
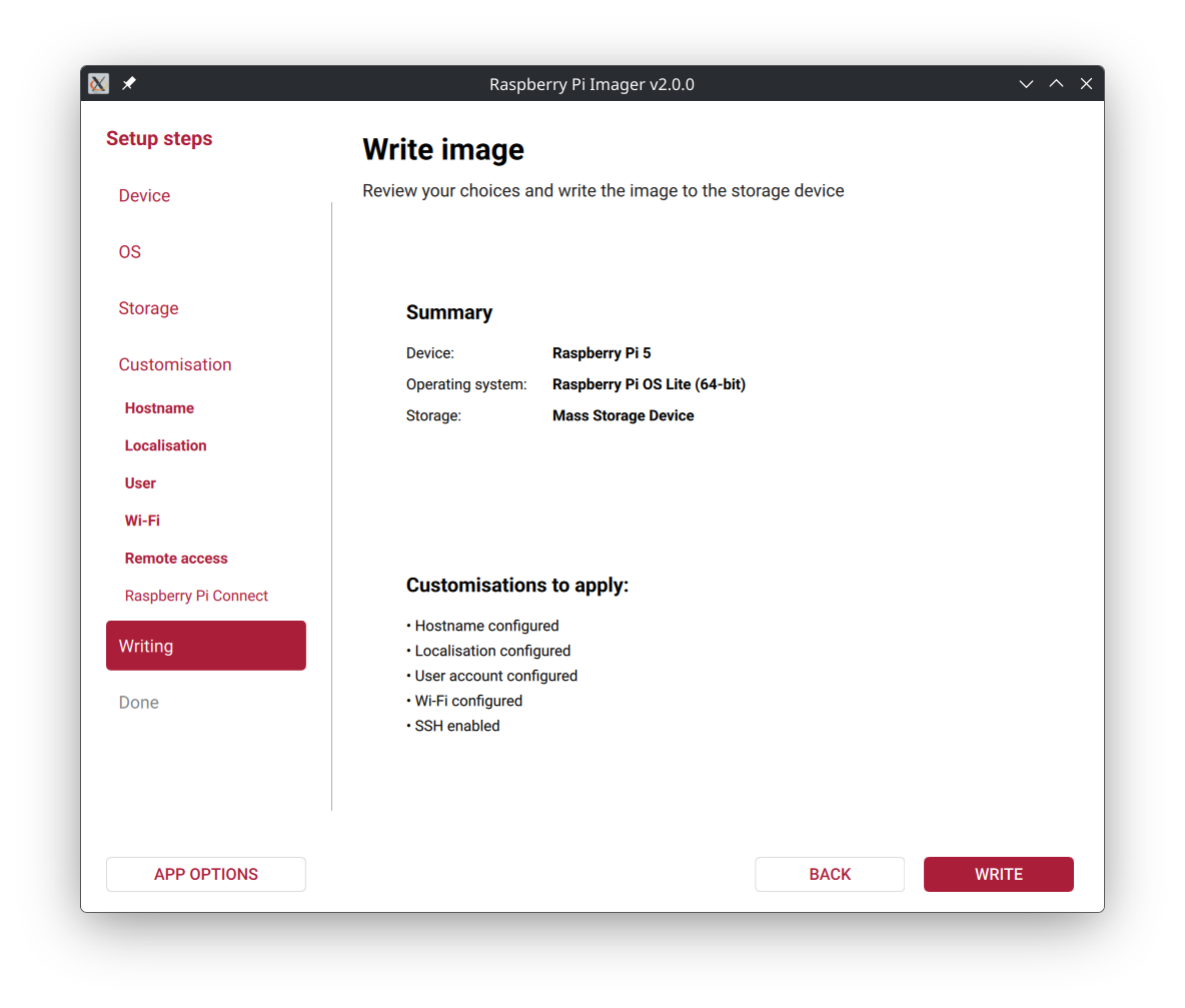
Press Write and for the image to be flashed and verified.
Booting the Pi
Insert the flashed microSD card into the Raspberry Pi and power it on. If using Ethernet, connect the network cable before powering on.
Upon booting the Pi, you will see a “My IP address is …” message. Take note of the IP address for SSH access.
Connect to the Pi via SSH
SSH is available on all Macs, Linux systems, and Windows 10 or newer.
You can use your computer’s Terminal (Mac, Linux) or Command Prompt (Windows) app to use SSH.
Run the following command, replacing username with the username you set during the Pi OS Lite installation, and ip_address with the IP address displayed on the Pi:
ssh username@ip_addressYou will be asked to accept the Pi’s SSH key and enter the password you set during installation.
Once in the Pi’s shell, you are ready to complete the next steps.
Running the Kiosk Installer
Python’s Virtual Environment module is required to run the installation script.
Install it with:
sudo apt install python3-venvDownload the installation script:
curl -SLo install.py https://raw.githubusercontent.com/MercsMavs-MSA/Second/refs/heads/main/pi_os_installer/main.pyRun the installation script with superuser privileges:
sudo python3 install.pyReboot the Pi into the new kiosk environment:
sudo rebootPost-Installation
Congratulations! Your Raspberry Pi should now boot directly into the Second kiosk application.
Configure the device by following the guide here.